Showing posts with label JSON. Show all posts

Thursday, October 30, 2014

SignalR - C# Client

Intro

In Part 1 of this duet of posts I gave a brief overview of WebSockets, creating a basic SignalR server, and a JavaScript/html SignalR client. Here in the 2nd part we'll see how to create a C# client of SignalR. For the example we'll be using a WinForms project, but you could easily adapt this to a console program, windows service, WPF, DLL, or whatever you desire in C#. On to the code!


Code Sample

First, here's where we left off with our code last week. Download it and open it up in VS 2013. Review Part 1 if you're fuzzy on how some of this stuff works then come on back.

We'llstart today's coding by creating a new WinForms application in VS Express 2013. Go ahead and create yours. I've named mine BlogSignalRClient. Open up Form1 in designer view and add a textbox. Make it MultiLine and give it both scroll bars.

Now add the Microsoft.AspNet.SignalR.Client NuGet package to the new project. Open up the Form1.cs file in code view and paste in the following code:

using Microsoft.AspNet.SignalR.Client;
using System;
using System.Windows.Forms;

namespace BlogSignalRClient
{
    public partial class Form1 : Form
    {
        public IHubProxy HubProxy { get; set; }
        public const string ServerUrl = "http://localhost:61376/";
        public HubConnection Connection { get; set; }

        public async void Connect()
        {
            Connection = new HubConnection(ServerUrl);
            HubProxy = Connection.CreateHubProxy("NotificationHub");
            await Connection.Start();
            HubProxy.On("BroadcastMessage", (message) =>
                this.Invoke((Action)(() =>
                    textBox1.AppendText(String.Format("{0}" + Environment.NewLine, message))
                ))
            );
        }

        public Form1()
        {
            InitializeComponent();
        }

        private void Form1_Load(object sender, EventArgs e)
        {
            Connect();
        }

    }
}


You'll notice that in the Load event we're calling our Connect method. This creates a connection to the SignalR Hub named "NotificationHub" that we created last week. It then creates an instance of HubProxy that will mirror the methods from our SignalR hub. It then opens up the connection, and finally creates an event on the proxy such that when a message is broadcast via the BroadcastMessage method, we will respond in the app by adding the message to our textbox.

Let's test this sucker. If you haven't already, open up last week's project in Visual Studio 2013 and run it. Navigate to the admin.html page as it's where we send messages. Take note of the port you have in your browser window, and modify the code from above appropriately. Now launch the new WinForms app. Click back on your browser window again and type something into the box, then click the Disseminate button.


Click back on your WinForms app again and voila! You should see the message displayed in your textbox.


What's Next?

That's about it for my foray into SignalR. I suggest you experiment with it on your own, see what apps you can think of that would benefit from a real-time 2-way conversation and make them.

Resources

Using SignalR in WinForms and WPF
My WinForms SignalR Code

Thursday, July 24, 2014

NoSQL - MongoDB; Querying Data

Intro

In Part 1 of the series on NoSQL we were introduced to some of the general concepts behind this movement and how some of the technologies work in a general sense. In Part 2 we setup a MongoDB instance and wrote some C# code to insert data into the DB. Here in the final installment of the series we'll cover getting our data back out of the MongoDB instance.

To the Code!

Let's jump on into some code. Open back up the solution file you created back in Part 2, BlogMongo. If you named your stuff the same I did, you can open up default.aspx and default.aspx.cs also as that's where we'll put our code. I'm adding a new button to the form called btnQuery and giving it a new click event, which I'll leave empty for the moment. Now, do you remember this function from last week?

        private MongoCollection GetMongoCollection()
        {
            var client = new MongoClient("mongodb://localhost");
            var server = client.GetServer();
            var database = server.GetDatabase("BlogMongo");
            return database.GetCollection<Stuff>("stuffses");
        }


This is the function we used last week to connect to our database and our collection (table), using the Mongo C# driver. Now let's pull some data out of it; you'll be surprised just how easy this is:

        
        private void QueryStuff()
        {
            var collection = GetMongoCollection();
            var singleQuery = Query<Stuff>.EQ(e => e.SomeInt, 3);
            var stuff = collection.FindOneAs<Stuff>(singleQuery);
            var serializer = new JavaScriptSerializer();
            Response.Write(serializer.Serialize(stuff));
        }


This method pulls a single document/object out of the database and collection and spits it out in the response. The first line of the method just opens up a connection to the database and retrieves a reference to our collection. The second line creates a Mongo query object (you'll have to add a using statement to MongoDB.Driver.Builders). The query object should return object(s) of type Stuff, and the query shall look for an item with a value of 3 for the property SomeInt. The 3rd line tells the collection to pull back a single item of type Stuff that matches the query we created in the previous line. Line 4 creates a javascript serialization object that we're just using to display some friendly output, and line 5 spits out our serialized JSON object to the browser. Yes that's right, 3 lines of code (which we could easily condense further) pulls a specific object out of the database for us. Nifty! Go ahead and call this new method in the click event of your query button so you can see the output. Just in case you're not coding along with me, here's what the output looks like:

{"Id":"d639cae8-906a-4d7c-ab6d-553319a8a70e","SomeInt":3,"SomeString":"yeah, a string","ListOfStrings":["0","1","2"]}

Ok that was some really cool stuff. Almost as cool as an iceberg hitting you in the face! But how do we create some niftier, more complicated queries? Well as it turns out, the Mongo C# driver supports quite a few LINQ operations for data querying so you can have some real fun here! Let's see another example of querying MongoDB data, this time with LINQ:

        private void QueryStuff()
        {
            var collection = GetMongoCollection();
            var singleQuery = Query<Stuff>.EQ(e => e.SomeInt, 3);
            var stuff = collection.FindOneAs<Stuff>(singleQuery);
            var serializer = new JavaScriptSerializer();
            Response.Write(serializer.Serialize(stuff));
            var linqQuery = from item in collection.AsQueryable<Stuff>()
                            where item.SomeString == "yeah, a string"
                            select item;
            foreach (var item in linqQuery)
                Response.Write(serializer.Serialize(item));
        }


Our new code starts on line 6, beneath the prior junk. Line 6 sets up our LINQ query. I'm assuming you're familiar enough with LINQ to either create LINQ queries or google around to figure out how to make them so I won't go into detail on it, but as you can see this query is meant to select all the items from our collection who have a SomeString property with the value "yeah, a string". (Note: you'll need to add 2 more using statements. MongoDB.Driver.Linq and System.Linq). The foreach below it is just our output generation code. Easy, simple, and powerful, that's the best kind of code there is! Here is the new output (note that it includes the prior line of output too, so there's 1 extra object of type Stuff here):

{"Id":"d639cae8-906a-4d7c-ab6d-553319a8a70e","SomeInt":3,"SomeString":"yeah, a string","ListOfStrings":["0","1","2"]}{"Id":"d639cae8-906a-4d7c-ab6d-553319a8a70e","SomeInt":3,"SomeString":"yeah, a string","ListOfStrings":["0","1","2"]}{"Id":"494be80b-5f1a-48c4-9a15-3c01f89d2216","SomeInt":4,"SomeString":"yeah, a string","ListOfStrings":["0","1","2","3"]}{"Id":"a089f1bd-c33b-43ae-9f25-894e0c5e31c2","SomeInt":5,"SomeString":"yeah, a string","ListOfStrings":["0","1","2","3","4"]}{"Id":"097c8d4f-fff4-4daa-a535-75d38fe87199","SomeInt":3,"SomeString":"yeah, a string","ListOfStrings":["0","1","2"]}

That's pretty much all we're going to cover folks! These are just the basics of querying a MongoDB instance, but this will get you pretty far. Here's the complete code file in case you need it:

using MongoDB.Bson;
using MongoDB.Driver;
using MongoDB.Driver.Builders;
using System;
using System.Collections.Generic;
using System.Web.Script.Serialization;
using System.Linq;
using MongoDB.Driver.Linq;

namespace BlogMongo
{
    public class Stuff
    {
        public Guid Id { get; set; }
        public int SomeInt { get; set; }
        public string SomeString { get; set; }
        public IList<string> ListOfStrings { get; set; }
        public Stuff()
        {
            ListOfStrings = new List<string>();
        }
    }

    public partial class Default : System.Web.UI.Page
    {
        private Stuff GenerateStuff()
        {
            var stuff = new Stuff() { Id = Guid.NewGuid(), SomeInt = new Random().Next(0, 10), SomeString = "yeah, a string" };
            for (int i = 0; i < stuff.SomeInt; i++)
                stuff.ListOfStrings.Add(i.ToString());
            return stuff;
        }

        private MongoCollection GetMongoCollection()
        {
            var client = new MongoClient("mongodb://localhost");
            var server = client.GetServer();
            var database = server.GetDatabase("BlogMongo");
            return database.GetCollection<Stuff>("stuffses");
        }

        private void SaveStuff()
        {
            var stuff = GenerateStuff();
            var collection = GetMongoCollection();
            collection.Save(stuff);
        }

        private void QueryStuff()
        {
            var collection = GetMongoCollection();
            var singleQuery = Query<Stuff>.EQ(e => e.SomeInt, 3);
            var stuff = collection.FindOneAs<Stuff>(singleQuery);
            var serializer = new JavaScriptSerializer();
            Response.Write(serializer.Serialize(stuff));
            var linqQuery = from item in collection.AsQueryable<Stuff>()
                            where item.SomeString == "yeah, a string"
                            select item;
            foreach (var item in linqQuery)
                Response.Write(serializer.Serialize(item));
        }

        protected void btnQuery_Click(object sender, EventArgs e)
        {
            QueryStuff();
        }

        protected void btnSave_Click(object sender, EventArgs e)
        {
            SaveStuff();
        }

    }
}


What's Next

There are plenty of other ways to query a MongoDB instance. Play around with it and see what you can find, and read the resource links below. The Mongo C# LINQ tutorial and the Mongo C# Driver Getting Started pages are both very handy. This is my last blog on NoSQL (at least for now) though, so we'll be on to a different topic next week. If you want further NoSQL knowledge, then you're on your own buddy!

Resources

MongoDB C# Driver LINQ Tutorial
MongoDB Getting Started With the C# Driver

Thursday, July 17, 2014

NoSQL - MongoDB; Setup and Saving Data

Intro

In the previous post in this series I covered the basics of NoSQL data stores. I briefly mentioned MongoDB and its home in the NoSQL world as a document store. This week I'll go over some of the basics of using MongoDB in your c# code. Hold onto yer hats folks, we're in for a ride!

Setting up Mongo Locally

Go to the MongoDB download page, download and setup the correct version of Mongo for your OS. The instructions on their site are better than anything I can write, so do what they say and you'll be fine :). Be sure to actually run the MongoDB system after you install it (there are instructions for running the program on their website too), as it's pretty tough to connect to a database that isn't running.

A Free MongoDB GUI

MongoDB does not come with a GUI. If you've got a SQL Server background you've probably become accustomed to visualizing your data using SQL Server Management Studio, as it's a very handy GUI for navigating around your data. Mongo does have a couple options, they just don't come with MongoDB. For this tutorial, I'll be using MongoVue, which I suggest you download too for your own usage. I won't get into general usage of this program as it's pretty easy and it's detailed nicely on their website.

A Quick Bit of Mongo Terminology

If you have a SQL background you're well on your way to understanding how a MongoDB server is organized. The only thing that may throw you off initially is Mongo doesn't use tables. The closes thing they have is a Collection, which is roughly akin to a table. You're supposed to store only a single type of object within each collection, though it's not enforced. Still, it's a good idea as it keeps your data organized.

Saving Data

OK then cool cats, it's time to fire up Visual Studio and play with Mongo. Create yourself a new webforms project. I called mine BlogMongo, but call yours whatever you like. Now go into NuGet package manager and install the package "mongocsharpdriver" into your project. This NuGet package contains everything you need to read and write data using MongoDB and C#. It's the official package listed on the MongoDB site, so it's my preferred option though there are others out there.

Drop a server-side button on your webform.Call the button btnSave. Add a click() event to it.Add a couple using statements too; one for MongoDB.Bson and one for MongoDB.Driver. Now I'll work a little coding magic, paste it in here, and discuss below:

using MongoDB.Bson;
using MongoDB.Driver;
using System;
using System.Collections.Generic;

namespace BlogMongo
{
    public class Stuff
    {
        public Guid Id { get; set; }
        public int SomeInt { get; set; }
        public string SomeString { get; set; }
        public IList<string> ListOfStrings { get; set; }
        public Stuff()
        {
            ListOfStrings = new List<string>();
        }
    }

    public partial class Default : System.Web.UI.Page
    {
        private Stuff GenerateStuff()
        {
            var stuff = new Stuff() { Id = Guid.NewGuid(), SomeInt = new Random().Next(0, 10), SomeString = "yeah, a string" };
            for (int i = 0; i < stuff.SomeInt; i++)
                stuff.ListOfStrings.Add(i.ToString());
            return stuff;
        }

        private MongoCollection GetMongoCollection()
        {
            var client = new MongoClient("mongodb://localhost");
            var server = client.GetServer();
            var database = server.GetDatabase("BlogMongo");
            return database.GetCollection<Stuff>("stuffses");
        }

        private void SaveStuff()
        {
            var stuff = GenerateStuff();
            var collection = GetMongoCollection();
            collection.Save(stuff);
        }

        protected void btnSave_Click(object sender, EventArgs e)
        {
            SaveStuff();
        }

        protected void Page_Load(object sender, EventArgs e)
        {
        }
    }
}


You'll see after the using statements, the first thing we've done is add a class called Stuff. This is just our POCO (plain old CLR object) that we'll store in the database. The GenerateStuff() method within our page merely creates an object of type Stuff and puts some data in it.

GetMongoCollection() is where things start to get interesting. The first line in the function gets us a reference to an MongoClient object, which is how you connect to a Mongo database. The code is connecting to the local installation we did up above. Line 2 of the method gets a reference to the Mongo server. In this case it's the same machine, but hey we need an object. Line 3 gets a reference to a database named BlogMongo within the Mongo server. Those of you reading carefully might be thinking "uh...Pete, forget something? Like maybe creating the database?". Nay friends, nay! I forgot no such thing! Call it a feature or call it a piece of kryptonite, but Mongo will create a database automatically the first time you save some data into it. So, even though this database doesn't yet exist, we can reference it. Neato! Line 4 retrieves from the database a collection (or table if you'd rather) named stuffses. Note that this collection doesn't exist yet either; the same rule for database creation applies to collection creation.

The next interesting method is SaveStuff(). It's pretty compact at 3 lines, and the 3rd line is the only really new bit of awesome. This uses our collection reference that we created above and calls its Save() method in order to save our stuff object which is of type Stuff. The Save() method is used for an upsert. There are separate Insert() and Update() methods, but I prefer to use this multipurpose method.

Now, just to prove the magic is still alive in my relationship with the code, I ran this little fella and clicked the button 4 times. Here is the representation of our data in MongoVUE:


A quick note on the storage behind MongoDB: MongoDB stores its data in BSON format, which is Binary JSON. It's just a flavor of JSON with a little bit of extra bells and whistles. That's why, in the above screenshot of MongoVue, I elected to show you the JSON representation of our stored objects. JSON is a pretty universal communication mechanism these days, so getting used to seeing it an using it can only benefit you.

Ok one last quick note, then I'm done noting. Really: See how there is no field named Id in my stored objects in that MongoVue screenshot, even though there is a field in the class Stuff named Id? This is because the Mongo C# driver will automatically use any field named Id as your primary key/id field, which is how documents are identified within the MongoDB database. MongoDB however stores such fields with a name of _id unless you specify otherwise, so in this case the field Id (which is a useful standard, so name your Id fields this if you can) maps to _id in the MongoDB database.

What's Next?

Next week will be the final installment of NoSQL/Mongo. I'll show you guys how to query data. Maybe a few other tricks too if I have the time and we have enough space on the blog post.

I encourage you to read up on using the Mongo C# driver using the link in the resources section below.We only scratched the surface this week, and we'll lightly gouge it next week. There's still plenty we won't have time for though, so if you like MongoDB and you want to learn more, their website is the best place to get into it.

Resources

MongoDB-Getting Started With the C# Driver

Thursday, May 8, 2014

A Chess Project, Part 13 (The Final Chapter)

Intro

I can see the light at the end of the tunnel! It's an alternating black and white checkered light, but still, a light nonetheless. How many of you thought it would take 13 blog posts to get here? Well I sure didn't, but I'm glad we're almost done. Here in week 13 we'll be modifying our Web API that we created months ago. We'll make it call into our spiffy chess AI dll in order to determine the best move from a given board position. After all, that's what we were trying to do from the very start!


 Code Changes

First, here is the absolute latest code as it stands right now, before today's modifications. It's not the most optimized, and I dare say the AI isn't really all that great, but hey the point of this blog was learning new technologies not to make the perfect chess AI.

Let's get to work. Open up BlogChessController from the BlogChessApi project. That method named PostBestMove is the one we want to do our modifications in. Here's what it looks like currently:

        public HttpResponseMessage PostBestMove(ChessGame game)
        {
            try
            {
                //validate the game
                var validator = new ChessGameValidator(game);
                if (!validator.Validate())
                    return Request.CreateResponse(HttpStatusCode.BadRequest, validator.ValidationIssues);

                //calculate the best move
                IChessValidMoveCalculator moveCalculator = new ChessValidMoveCalculator(game);
                var validMoves = moveCalculator.CalculateValidMoves();

                //return the best move wrapped in an http "ok" result
                return Request.CreateResponse(HttpStatusCode.OK, validMoves);
            }
            catch (Exception ex)
            {
                return Request.CreateErrorResponse(HttpStatusCode.InternalServerError, ex);
            }
        }


You'll notice we don't yet have a call into the AI dll. At the time we originally made this method we had no such AI dll, so I can forgive us. Before we can do the code though, we need to reference BlogChess.AI.Basic1 from the Web API project. Go ahead and do that now (I'm assuming you've seen that enough that no screenshots are necessary). Add a using statement up at the top of the unit while you're at it.

All we really need to do is add in a call to our Negamax evaluation, then add in a little bit of logic to look for win/draw conditions. All of this is just calling methods we've already written. Your newly modified should look like the following:

        public HttpResponseMessage PostBestMove(ChessGame game)
        {
            try
            {
                //validate the game
                var validator = new ChessGameValidator(game);
                if (!validator.Validate())
                    return Request.CreateResponse(HttpStatusCode.BadRequest, validator.ValidationIssues);

                //calculate the best move
                var bestMove = Negamax.Evaluate(game, 2, game.GameStatus == GameStatus.WhitesTurn);
                var responseGame = bestMove.Item2;
                responseGame.CurrentEvaluation = bestMove.Item1;

                //is a win or draw, set game move accordingly
                IChessValidMoveCalculator moveCalculator = new ChessValidMoveCalculator(game);
                var availableMoves = moveCalculator.CalculateValidMoves();
                if (availableMoves.Count == 0)
                {
                    var isKingInCheck = moveCalculator.IsKingInCheck(game.GameStatus == GameStatus.WhitesTurn, ((IList<ChessBoard>)game.Positions)[0]);
                    //look for checkmate
                    if (availableMoves.Count == 0 && isKingInCheck)
                        responseGame.GameStatus = game.GameStatus == GameStatus.WhitesTurn ? GameStatus.WhiteWin : GameStatus.BlackWin;
                    //look for draw
                    else if (availableMoves.Count == 0 && !isKingInCheck)
                        responseGame.GameStatus = GameStatus.Draw;
                }
                else //just the next turn now
                {
                    responseGame.GameStatus = game.GameStatus == GameStatus.BlacksTurn ? GameStatus.WhitesTurn : GameStatus.BlacksTurn;
                }

                //return the best move wrapped in an http "ok" result
                return Request.CreateResponse(HttpStatusCode.OK, responseGame);
            }
            catch (Exception ex)
            {
                return Request.CreateErrorResponse(HttpStatusCode.InternalServerError, ex);
            }
        }


As advertised, just a couple minor additions to call our evaluator and check for end of game.


Testing It

Remember way back when, that web forms project BlogChessApiFlexer? It's right there in the solution, and it's just itching to call the modified web api method. We had already coded a call into the web api (in default.aspx.cs), but prior to now we were just passing in a dummy request and expecting a dummy response. Well now it's time for an appropriate request and response!

        public ChessGame Game
        {
            get
            {
                return Session["Game"] as ChessGame;
            }
            set
            {
                Session["Game"] = value;
            }
        }

        protected void btnServerTest_Click(object sender, EventArgs e)
        {
            //1. Create and setup client object
            using (var client = new HttpClient() { BaseAddress = new Uri("http://localhost:11482/"), Timeout = TimeSpan.FromSeconds(300) })
            {
                client.DefaultRequestHeaders.Accept.Add(new MediaTypeWithQualityHeaderValue("application/json"));
                //2. Create a blank chess game to send up in the post request
                if (Game == null)
                {
                    Game = new ChessGame() { GameStatus = GameStatus.WhitesTurn };
                    var positions = new List<ChessBoard>();
                    var sampleBoard = new ChessBoard(true);
                    sampleBoard.Board = new short[8, 8] { { -4, -2, -3, -5, -6, -3, -2, -4 }, { -1, -1, -1, -1, -1, -1, -1, -1 }, { 0, 0, 0, 0, 0, 0, 0, 0 }, { 0, 0, 0, 0, 0, 0, 0, 0 }, { 0, 0, 0, 0, 0, 0, 0, 0 }, { 0, 0, 0, 0, 0, 0, 0, 0 }, { 1, 1, 1, 1, 1, 1, 1, 1 }, { 4, 2, 3, 5, 6, 3, 2, 4 } };
                    positions.Add(sampleBoard);
                    Game.Positions = positions;
                }
                int numPositions = ((IList<ChessBoard>)Game.Positions).Count;

                //3. Send the request
                var response = client.PostAsJsonAsync("api/BlogChess/BestMove", Game).Result;
                if (response.IsSuccessStatusCode)
                {
                    //4. Read the result from the response, display the "best move"
                    var result = response.Content.ReadAsStringAsync().Result;
                    var resultObject = JsonConvert.DeserializeObject<ChessGame>(result);
                    Game.GameStatus = resultObject.GameStatus;
                    ((IList<ChessBoard>)Game.Positions).Clear();
                    for (int positionIndex = 0; positionIndex < numPositions + 1; positionIndex++)
                    {
                        if (((IList<ChessBoard>)resultObject.Positions).Count > positionIndex)
                            ((IList<ChessBoard>)Game.Positions).Add(((IList<ChessBoard>)resultObject.Positions)[positionIndex]);
                    }
                    lblResult.Text = "Success! :" + result;
                }
                else //5. Request failed; tell the user what happened
                    lblResult.Text = "Failzor'd!: " + response.StatusCode.ToString() + "::" + response.ReasonPhrase;
            }
        }


Let's start with the easiest part, the propert Game of type ChessGame. If you've done webforms before, this shouldn't require much of an explanation. This is just a handy, type-safe way for me to be able to reference the current game object from the session so I can persist information about a single game in memory. Moving on to the button click event...

And here's the meat. Some of this was already here. As I said above, we were already calling the web api. What's new is we're now creating and serializing a chess game object (the one from our session), and we're passing this game object to the web api. Then we're taking the result of this call and updating the Game property. This means that, if you keep clicking that button, the AI will play itself! How cool is that? Well it's moderately cool, as it's incredibly slow. But hey, baby steps.

Wrapping it Up

Thanks for sticking with this series of articles everybody. As can happen with coding endeavors, it got away from me a bit. I thought this might be a 4 or 5 article series, not 13. I hope you learned a few new things, and maybe even gained a little bit of interest in chess in the process of reading these.

Oh and here's the absolutely final code, all fanciful and whatnot.

What's Next?

There are a few things you could do really. You could load AI dlls dynamically, configurable via database entry or config file. This would make it easier for other people to create AI dlls that plug into your web api, and you could have clients configured to choose a specific AI. You could also optimize the existing AI dll further (or just make your own) to make it much much quicker (hint: bitboard!). Or just go have a beer, or martini, or diet dr pepper. Whatever.


Resources

online chess board editor at Apronus.com
Chess.com, a great site for everything chess related 

Tuesday, January 21, 2014

A Chess Project, Part 3

Intro

This is part 3 in a series on creating a chess Web API HTTP Service. In Part 1 we gave an overview of the project requirements. In Part 2 we created the very basic Web API Service skeleton. Here in Part 3 we cover how to connect to a Web API Service two different ways, one using c# code and one using JavaScript. For the purposes of this tutorial we will do all our communication via JSON, though you could almost as easily communicate via XML or even create your own serialization scheme.

Viewing Sample Data

Before we get started on connecting to the API with client code I thought I'd make a small modification to the ChessBoard struct from last week, just for the purpose of visualization. Specifically, I want to initialize the 8x8 array of short that represents the pieces on the board. It currently is an empty 8x8 array, but I want to initialize the values to all 0's. I plan on using 0 to mean that the square is empty, so it's logical that we would want to start with an empty board. The updated code is shown below:

using System;

namespace BlogChess.Backend
{
    public struct ChessBoard
    {
        public short[,] Board;

        /// 
        /// Constructor
        /// 
        /// as implied by the parameter name, this parameter is useless.
        /// It is only here because you cannot have a parameterless constructor in a struct.
        public ChessBoard(bool throwAway) : this()
        {
            Board = new short[8, 8];
            for (int row = 0; row < 8; row++)
            {
                for (int column = 0; column < 8; column++)
                    Board[row, column] = 0;
            }
        }
    }
}


It's not really much of a change, as you can see. The only difference is the addition of the nested for loops. The real reasons behind doing this is so that you can visualize better what a ChessBoard object looks like in JSON, and so it will be easier to create the appropriate classes in JavaScript.

In this next snippet of code I've added a new method to the BlogChessController class, GetSampleGame. This method is here solely to return a default-populated ChessGame object, thus making it easier for a JavaScript client to know what to send up. That's it; it's just an aid for clients and peoplezez.

        /// 
        /// This is a simple get method so someone can see the structure of a chess game object and its sub-objects
        /// 
        /// A default-state chess game object
        public HttpResponseMessage GetSampleGame()
        {
            var result = new ChessGame() { GameStatus = GameStatus.BlackWin };
            var positions = new List<ChessBoard>();
            positions.Add(new ChessBoard(true));
            result.Positions = positions;
            return Request.CreateResponse(result);
        }


As you can see above, this method has the same return type as the method from Part 2 of the tutorial. What we are doing here is creating a ChessGame, populating it's positions property (an enumerable of type ChessBoard) with a single default ChessBoard (all 0's), and returning that ChessGame. The WebMethod above starts with th word "Get", so it will respond to the HTTP Get verb. This should be your first moment of ah-ha excitement for the week; you can now fire up the service in the VisualStudio debugger and browse to the url for this WebMethod http://localhost:11482/api/BlogChess/SampleGame (note that your port may be different). You will probably be asked (it depends on your browser) if you want to open a .json file. If so click yes. You will then see the following output:

{"Positions":[{"Board":[[0,0,0,0,0,0,0,0],[0,0,0,0,0,0,0,0],[0,0,0,0,0,0,0,0],[0,0,0,0,0,0,0,0],[0,0,0,0,0,0,0,0],[0,0,0,0,0,0,0,0],[0,0,0,0,0,0,0,0],[0,0,0,0,0,0,0,0]]}],"GameStatus":3}

Huzza! We have now called a quick and dirty sample webmethod (albeit one that we don't need for the final result of the project) using nothing but a web browser! The end part of the URL shown above is our web method; Note that you just use "SampleGame", not "GetSampleGame" as the purpose of the word Get above is just to denote which HTTP verb we respond to.

Connecting via C# Client

OK now it's time to really roll up the sleeves and get crackin. We're going to connect to the original API Method PostBestMove via some C# code. Go ahead and add a new Web Application to your BlogChess solution.


Choose Visual C#, Web, ASP.Net Web Application. Change the name to BlogChessApiFlexer, click OK.

Choose the "Empty" template, check the box for "Web Forms", and click the OK button.


Now you've got a project in your solution named BlogChessApiFlexer. But hey, you already knew that because you just did it. Add a new web form to this new project; name the web form Default. Right-click on the new project, click Add, then Web Form, type in the name and hit OK.


The easiest way to call our Web API Service using C# is to add the Web API Client Libraries to our project. You already have this thing installed into your solution, you just need to add it to the BlogChessApiFlexer project. Go to Tools, Library Package Manager, Manage NuGet Packages for Solution.


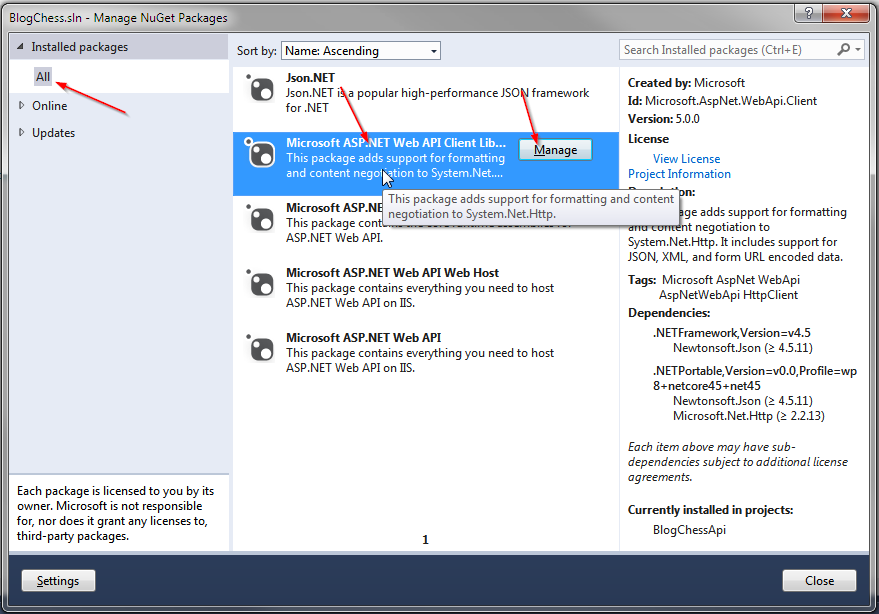
 Click on Installed Packages, All, Microsoft ASP.Net Web API Client Libraries, and click the Manage button.


Click the checkbox next to BlogChessApiFlexer and click the OK button.


Close the NuGet packages window. You'll also need to add a reference to BlogChess.Backend in the BlogChessApiFlexer project. Go ahead and do that, I'll wait.

Now it's time to mess with Default.aspx. We're going to keep the page pretty simple. It needs 2 buttons and 1 label, that's it. One button will postback to the server and have a server-side Click event handler. The other button we'll deal with later. The label will have the results of our tests in it, but for now it can be empty. Here is the full default.aspx file as of right now:

<%@ Page Language="C#" AutoEventWireup="true" CodeBehind="Default.aspx.cs" Inherits="BlogChessApiFlexer.Default" %>

<html xmlns="http://www.w3.org/1999/xhtml">
<head runat="server">
    Ooh, Web API Sample Clients
</head>
<body>
    <form id="form1" runat="server">
    
</form> </body> </html>


Here is the C# code-behind file, Default.aspx.cs. I'll explain it below the source code.

using System;
using System.Collections.Generic;
using System.Net.Http;
using System.Net.Http.Headers;
using BlogChess.Backend;

namespace BlogChessApiFlexer
{
    public partial class Default : System.Web.UI.Page
    {
        protected void btnServerTest_Click(object sender, EventArgs e)
        {
            //1. Create and setup client object
            HttpClient client = new HttpClient() { BaseAddress = new Uri("http://localhost:11482/") };
            client.DefaultRequestHeaders.Accept.Add(new MediaTypeWithQualityHeaderValue("application/json"));
            //2. Create a blank chess game to send up in the post request
            var game = new ChessGame() { GameStatus = GameStatus.Draw };
            var positions = new List<ChessBoard>();
            positions.Add(new ChessBoard(true));
            game.Positions = positions;
            //3. Send the request
            var response = client.PostAsJsonAsync("api/BlogChess/BestMove", game).Result;
            if (response.IsSuccessStatusCode)
            {
                //4. Read the result from the response, display the "best move"
                var bestMove = response.Content.ReadAsStringAsync().Result;
                lblResult.Text = "Success! :" + bestMove;
            }
            else //5. Request failed; tell the user what happened
                lblResult.Text = "Failzor'd!: " + response.StatusCode.ToString() + "::" + response.ReasonPhrase;
        }
    }
}


In section 1 we create an HttpClient object and assign it headers that will tell the server we expect a JSON response. This HttpClient object is what we will use to connect to the Web API Service. In section 2 we create a blank chess game that will be used as the single request parameter in the server post. Section 3 posts the request to the server; note that using the PostAsJsonAsync method will automatically convert that 2nd parameter to json for us. Section 4 assumes success, and reads the resulting "best move" from the response, displays it to the user. Section 5 assumes failure, displaying the HTTP error code and reason for failure.

Now run the website, loading up the default.aspx page. Click on the button "Server Test". You should see a result of 'Success!: "e4"'. Your C# client code has now called your server-side Web API Service. That's about it for the C# client! On to JS...


Connecting Via JavaScript Client

One easy way to connect to a Web API Service is through the use of a JavaScript library called JQuery. We'll probably get into JQuery more in a future blog post, but for now what you need to know is how to use it in your page. Modify the header of Default.aspx to look like this:


    Ooh, Web API Sample Clients


The change above is the addition of the script tag. We're just referencing the jquery library so we can use it. Now we have to add some more JavaScript in order to call the API, but you probably guessed that. Gold star for you! But no soup; the soup is mine. Here are the changes, and I'll explain the changes below the code:


Note: the above script tag goes in your header, below the script tag we added earlier for referencing JQuery. Section 1 of this new script tag is the definition of our JavaScript function bestMove(). This function will be used to call the API. Section 2 is where we setup some initial variables before making the call. Not much special, we just need an object of the proper format to send to our API method. Section 3 is where we call the API, and this is the most interesting part of the JS code. the jquery $.ajax() method is an easy way to make calls to services. As you can see, it is very easy to specify the url, type (post, get, etc), the content type (we want json!), and functions to call on success and failure. By default this function call is asynchronous, so these handlers (success function and error function) are how you will know that the call to the service is done. Section 4 is where we hook up the button click event to the function we declared above.

Now run the website, loading up default.aspx. Click the button market "Client Test". You should see the resulting string 'e4'. That wasn't too bad was it? You've now created a Web API and called it using 2 different languages. Fun stuff, highly useful, and highly portable. Gotta love Web API.


What's Next

Next week we'll have to code in some game validation and the logic for checking for victory, draw, etc. I believe that leaves us a 5th and hopefully final posting in this series for tackling the AI. Thanks for reading, and I hope you are looking forward to post #4!

Resources

  • http://www.asp.net/web-api/overview/web-api-clients/calling-a-web-api-from-a-net-client
  • http://www.codeproject.com/Articles/424461/Implementing-Consuming-ASP-NET-WEB-API-from-JQuery
  • http://www.json.org/
  • http://jquery.com/ 
  • http://api.jquery.com/jquery.ajax/

Thursday, January 16, 2014

A Chess Project, Part 2

Intro

We're going to continue our chess project, the one we introduced last week in Part 1 of the series. In week 1 we covered the requirements of the project. The capabilities we are looking for and the input and output required. Here in Part 2 we will start creating the "interface" that our clients will use. This interface will be in the form of a Web API HTTP Service that client code can call from anywhere, as long as they have an internet connection.

Introduction to Web API

What is Web API? Web API is Microsoft's platform for building RESTful HTTP services. I'll assume you already know what HTTP is, but let's take a look at RESTful. First, REST stands for Representational State Transfer. The concept of RESTful architecture has been around for some time in the programming world; the Web is based on it. It basically means that the client doesn't necessarily need to know anything about what information and processes the server contains, as long as it has a uniform way to communicate with the server (via HTTP for the web). For our purposes we will be able to call our service RESTful if it properly applies HTTP verbs and resources. For example, if we want to post information to the service to have it calculate the best move and return it, we would use an http POST to accomplish this. There are of course other HTTP verbs such as GET, DELETE, PUT, and more, but for our small service POST will be the only applicable one. With Microsoft Web API HTTP Services you can rely on JSON and/or XML data. They are extremely portable due to accepting both JSON (very easy to find libraries based on JSON) and XML (also easy to find libraries based on XML). The coding is really quite simple I promise, so let's see how to create one.

Step-by-Step Instructions for Creating our Web API HTTP Service

First off, I assume that you have Visual Studio 2013. I am using Express for Web 2013 myself, so your screens may look a little different if you are using a different version.

Start by clicking on File-->New Project. Choose Visual C#, and ASP.Net Web Application. Type in the name BlogChess for the solution and hit the OK button.

On the next screen choose "Empty", click the checkbox to add folders and core references for Web API and hit the OK button.


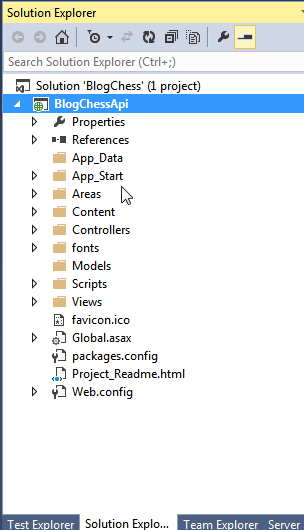
You now have your very own Web API Service. I'd like to rename the project (not the solution, the project) to BlogChessApi so do that now. Right-click on the project, click Rename, type in the name BlogChessApi. Your Solution Explorer window should now look like this:


The next step is to decide how the client will communicate with the service. I believe a single post should do nicely for us, so we only need a single method. We'll call it CalculateMove. What will the client send for data? We'll create a ChessGame class that has a list of boards, and a single enum for whose turn it is. The board object will actually be just an 8x8 2-dimensional array of short where each short value represents a different piece (or no piece).

Just in case we use the ChessGame class elsewhere (and we probably will!), let's put it in a DLL rather than directly in the web service. Add a new DLL (class library) named BlogChess. Right-click the solution, choose Add and New Project.


In the window that comes up choose Visual C#, Windows, Class Library, type in the name BlogChess.Backend, and hit the OK button.


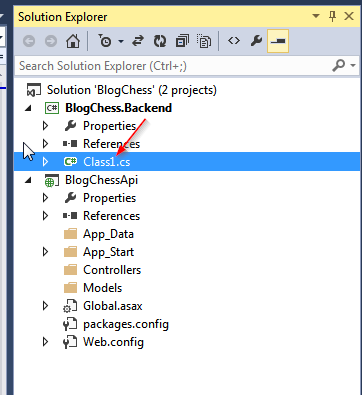
Now rename the file Class1.cs to ChessGame.cs, as this will be our data class.


Go ahead and add a public struct to BlogChess.Backend as well. This struct will be named ChessBoard. It's the easiest way we have to ensure that everywhere we want to represent a board as an 8x8 array of shorts that we will get it right. The code for Chessboard.cs is shown below.

using System;

namespace BlogChess.Backend
{
    public struct ChessBoard
    {
        public short[,] Board;

        /// 
        /// Constructor
        /// 
        /// as implied by the parameter name, this parameter is useless.
        /// It is only here because you cannot have a parameterless constructor in a struct.
        public ChessBoard(bool throwAway) : this()
        {
            Board = new short[8, 8];
        }
    }
}

Now we need to setup the ChessGame class so that it contains a list of ChessBoard objects as well as an enum that represents the status of the board position (black's turn, white's turn, draw, win for black, win for white). The code for ChessGame.cs is shown below.

using System.Collections.Generic;

namespace BlogChess.Backend
{
    /// 
    /// Current status of a chess game
    /// 
    public enum GameStatus
    {
        BlacksTurn,
        WhitesTurn,
        Draw,
        BlackWin,
        WhiteWin,
    }

    /// 
    /// A game of chess
    /// 
    public class ChessGame
    {
        public IEnumerable<chessboard> Positions { get; set; }
        public GameStatus GameStatus { get; set; }
    }
}

Lengthy post huh? Hang in there, we're making good progress here. If you've made it this far, drop by my office sometime and I'll give you a hearty pat on the back.

We've done what we needed to do in the backend dll, so let's dive back into the Web API Service.Web API Services follow the Model-View-Controller pattern (we'll probably discuss this more in the distant future) so you have to add a Controller class. The controller is what contains your methods that clients of your web service can see.

Right-click the Controllers folder in the BlogChessApi project and select Add, Controller.


On the next dialog select "Web API 2 Controller - Empty" and click the Add button.


Name the controller BlogChessController.


We're about to create the method BestMove that our clients will call, but first we need to add a reference in BlogChessApi to BlogChess.Backend. In the BlogChessApi project, right-click References, and click Add Reference.


Click Solution, BlogChess.Backend, and click OK.


The reference to BlogChess.Backend from BlogChessApi is now complete. It's time to get codin! Below you can see the entire BlogChessController.cs unit. It's really pretty sparse:

using System.Linq;
using System.Net;
using System.Net.Http;
using System.Web.Http;
using BlogChess.Backend;

namespace BlogChess.Controllers
{
    public class BlogChessController : ApiController
    {
        public HttpResponseMessage PostBestMove(ChessGame game)
        {
            //basic input validation...if required fields not specified, return an error message wrapped in an http "bad request" 400 result
            if (game == null || game.Positions == null || game.Positions.ToList().Count == 0)
                return Request.CreateErrorResponse(HttpStatusCode.BadRequest, "The game and at least 1 position must be specified.");
            //calculate move here
            string bestMove = "e4";
            //return the best move wrapped in an http "ok" result
            return Request.CreateResponse(HttpStatusCode.OK, bestMove);
        }
    }
}


Yes that's the entire unit. The first thing to note is our class descends from ApiController. This was already here when we generated the class. ApiController is a basic web api controller class that gives us a few goodies to make life a little easier.

The 2nd part of note is our single method PostBestMove. Let's start with the return type HttpResponseMessage. Here we are telling the service to return a valid HttpResponseMessage so that our result conforms to http message protocol. We could return a 404 (url not found), 400 (invalid request), 200 (OK), or any other http response we want by specifying this as the return type. The next noteworthy item is the name of the method, PostBestMove. When you put the word Post in the front of a method name in a Web API controller, you tell .Net what HTTP method your method will accept and respond to. In our case we want the user to send an HTTP post containing the information, so we use the word Post. You can also see that we accept a single parameter of type ChessGame. This is the list of board positions that we expect the client to provide in order for us to calculate and return the best move.

The 3rd thing to be aware of is our input validation section. The validation itself isn't very interesting; pretty mundane actually. The interesting part here is the return statement. Using Request.CreateErrorResponse, we can tell .Net to create an HTTP error response with the specified error code (in our case it's 400, Bad Request) and optionally tack a helpful string for the client onto the response.

The last thing to note is the calculation and return of the best move. The calculation is bare-bones for now. We'll fill that in a couple blogs from now. The return statement looks similar to the last return statement, except here we use CreateResponse instead of CreateErrorResponse. We're just telling the client that all is hunky dory.

Calling and debugging your brand new service is pretty easy; however, this post is already huge so I'll save that for next week. Teaser: you can access the debug version of your Web API service at http://localhost:11482/api/BlogChess/bestmove. You'll have to replace the port # with whatever port # your asp.net server runs on though.

What's Next?


That's it for this week guys! Tune in next week to see how to call the web api service using JavaScript and C#. I'll also cover how ASP.Net knows to access your service at http://localhost:11482/api/BlogChess/bestmove. Hint: the magic of routing!

 Feel free to read up on routing, Web API, and of course chess if you want to get ahead of the class. We've still got a good amount of work to do to round out this series!

Resources

http://www.asp.net/web-api
http://www.asp.net/web-api/overview/getting-started-with-aspnet-web-api/tutorial-your-first-web-api

Thursday, January 9, 2014

A Chess Project, Part 1

Intro

For the next few weeks I want to shake things up a bit. Rather than blogging about a specific topic for a post or two, I will detail a project and we will create it from start to finish. Along the way we will discuss requirements gathering, technical design, and probably some json and web api along with other things.

Project Overview and Requirements

I like to play chess. I'm really not too good at it but I find it fun and the concept of creating a computer opponent fascinates me. I'm not looking for a fully-fledged chess-playing app here though, as that would take more blog space and time than we've got, so we'll limit the scope a bit. I would like for us to create a reusable Chunk of Awesomeness (CoA) that can be called from multiple languages and different types of interfaces (web GUI, windows, IOS, etc). This CoA should be fed a chessboard/game, and spit out what move it thinks should be made; ie the "best" move available. Sounds simple neh? Wrong!

Before we get into the technical design, let's start with the business side of things. What exactly does a CoA need to know (input) in order to calculate the "best move" (output)?


Inputs:

  • You need to know every single board position that has occurred this game. Why? 
    • A threefold repetition of the same position means that either player can claim a draw. Because the point of the game is to win, or if all else fails you try for a draw, knowing when a draw might occur is useful knowledge. We will not code "draw" logic into our "best move" calculations in this project however due to our desire for simplicity.
    • 50 moves in a row that involve no captures and no pawn movements results in a draw. We won't code this logic in there either, but hey we might in the future.
    • You need to know if either player has moved their king or each rook. Moving the king and the rook that would be used in a castling in any way forfeits the ability to castle with that pair of pieces, so it takes away one potential type of movement the king has. This is very important logic that we will code into this initial release of our project.
    • Note: we will only require a single board position as input. This is because we want our project to be able to handle chess puzzles too, and in puzzles you don't usually get the full game history but instead get just a specific position and are asked to find the best move(s). So, we require only a single board position, but we allow the user to send up the whole game's board positions. Due to sheer laziness, if the initial board position sent up is not the standard chess game starting position then we will assume castling is still possible if a king and rook are in the proper positions.
  • Whose turn is it? This value is required only if we were not sent the entire game's board positions. If we have those, we can pretty easily figure out whose turn it is based on who moved last.
Note that there is an alternative input to every board position that's occurred: You could have the project assume a standard starting position and just send in the chess notation for all moves that have been performed this game. Again, I don't like this option because it limits our ability to have the project evaluate chess puzzles.

Outputs:

  • Algebraic chess notation of the move that the CoA deems best. (see below for a link to algebraic chess notation; we'll use the short form)
  • It's possible the computer may wish to offer a draw or offer to resign; however, that's outside the scope of this project. A draw offer is covered by chess notation anyways so it doesn't really mean we would need further output field(s), and our computer foe will never surrender!

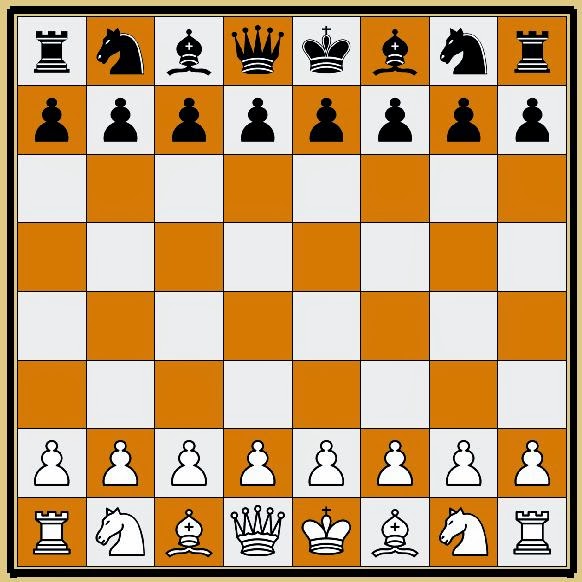
(bonus points for anyone that figures out why i pasted this image in here)

Technical Overview

First, the requirement to have this be a "reausable chunk of awesomenss" that can be called from multiple languages and different types of interfaces. To me this pretty much screams "web service". The evolution of web services in .Net over the past few years has gone something like this: Soap Web Service-->WCF-->Web API.

Soap web services have 2 main drawbacks: 1) They are a little bloated due to SOAP. SOAP is xml which is verbose compared to many other formats. I'm really not too worried about that for this project though as I don't think bandwidth will be that much of a concern. 2) SOAP web services have a rigid definition for calls into the service, so making modifications to the interface of your web service (the method signatures) requires that clients be updated/recompiled. I find this to be a large pain point with SOAP web services in .Net, so they're out.

Windows Communication Foundation (WCF) services were the next evolution of callable services on the web for the .Net platform. I've disliked them from day 1; the big drawback with these is they are a huge pain in the arse to configure correctly. They also have the same flexibility problem that regular web services do (and again, they are XML), so these are also out.

This takes us to Web API. These handy little services are built on a JSON foundation rather than XML. JavaScript Object Notation (JSON) is the new fad for data communication because of its portability (just about every platform out there today can create/parse JSON files), and it is less verbose than XML. Web API services don't really have any pain points in my opinion as they are easy to configure, and as long as you know what you are doing, updating a Web API service is much less likely to require clients to update their references/code.


The logic for determining the "best move" might get complex however, so we don't want this logic plopped directly into our web api service. This logic and any associated classes will be in a backend DLL. This gives us 2 advantages: 1) Unit testing the code will be both possible and much easier with the business logic being in a backend dll. 2) We can reuse this DLL later if we desire, for example in a GUI.


What Next?

I hope the above project description and technical overview got you interested in what's to come. For those of you that aren't familiar with chess, or just want a refresher, there is a link below in the resources section that gives some info. You can also pick up a book or two from pretty much any bookstore, or if you know me personally just ask and you can borrow one of the many chess books I have in my library.

You are also welcome to dip your toes into the world of JSON and web api, or you could review some of the older blogs on this site. You can even experiment with evaluating a chess position on your own via c# code if you're super-bored!

Resources

http://en.wikipedia.org/wiki/Rules_of_chess 
http://www.asp.net/web-api
http://en.wikipedia.org/wiki/Chess_notation